Showing posts with label Two for Tuesday. Show all posts

Tuesday, February 25, 2014

Two for Tuesday: Slow Cooker Ham and Potatoes; Pioneer Woman Dinner Rolls

I have two delicious recipes to share. I didn't come up with either of them, but I did modify both of them.

The first is from Rachel Ray, but the original involved mushrooms (which Sweetling and the Jedi hate) and fresh thyme (which I never have). I don't even have any dried thyme. So, I have no more thyme. Yeah, I kept myself amused with thyme puns while I was tearing through my spice drawer. You should all count yourselves lucky I only included one of them here.

Here's the recipe, with my thyme-less modifications. *Grin*

Slow Cooker Ham and Potatoes

Ingredients:
  • 4 tablespoons (1/2 stick) unsalted butter
  • 1 sliced yellow onion 
  • 1 bag sweet chili peppers (someone at co-op said, oh, those genetically modified things? I guess so...I like sci fi. I don't mind mutant peppers when they taste this good.)
  • 4-6 Yukon gold potatoes, peeled and submerged in a bowl of water
  • Mrs. Dash (yeah, I didn't measure)
  • several slices leftover ham (I had a bunch of ham leftover and needed a way to use it up)
  • 1-2 cups shredded cheddar cheese
  • 1 cup low-sodium chicken broth (or homemade chicken stock)
  • 1 cup heavy cream (next time, I'm going to try a cream substitute, but this time I just used real cream and took a lactaide pill when I ate dinner)

Directions: (don't be intimidated by how long it looks. I promise it's super-easy or I wouldn't have made it!)

  1. Wash, peel, and slice the potatoes. Submerge the slices in a bowl of cold water as you make them. Let them sit there. The water keeps them from discoloring and also does something magical to the starch in the potatoes, or so I'm told.
  2.  Wash and slice the onion and peppers. Melt butter in a large skillet and toss the vegetable slices in. Cook for a few minutes (3-5), till the onion turns just slightly translucent. You don't want to cook them down, just 'sweat' them a bit. (By the way, I leave the onion and pepper slices large so that certain people can pick them out of their food. I warned Sweetling and the Jedi that vegetables were involved, but that the vegetables were large and easy to remove. The Jedi said to Sweetling, "Mommy used to love us." And the two veggie-phobes leaned their heads together in sorrow.)
  3. Slice the ham. This could have been done as step 2, but I forgot. 
  4. Thoroughly spray a crock-pot with non-stick cooking spray.
  5. Grab a few potato slices, shake the water off them, and layer them in the bottom of the crockpot. When you have covered the bottom with a single layer of potatoes, season them with Mrs. Dash. I didn't use salt, so I was very generous with the Mrs. Dash. Sprinkle in some shredded cheese Repeat with a second layer of potatoes and Mrs. Dash. These two layers should use up about half of your potatoes. If your crock pot is deep but not wide, you might have to do three layers of potato slices before you go to step 6.
  6. Spread half of the onion pepper mixture on top of the potatoes. 
  7. Add a layer of sliced yummy ham.
  8. Add a big, big handful of shredded cheese. (When I made this on Sunday, I didn't put enough cheese in and wound up have to try to insert handfuls of cheese after the cream was hot and bubbly. Much easier to just increase the amount of initial cheese.)
  9. Go back to adding seasoned potato layers (with some shredded cheese between the potato layers). 
  10. When you've used up all your potatoes, spread the rest of the onion/pepper mixture on top.
  11.  Add a final layer of ham.
  12. Cover and cook on high for 4 hours.
  13. After 4 hours, pour a cup of heavy cream over the top of everything. Cover and continue cooking for another 30 minutes.
  14. Now, the original recipe said to turn the crock pot off and let the meal sit for an hour before eating. You know that didn't happen in my house. We were hungry. I did let it sit for 15-20 minutes, but that's all the rest time it got before we dug in.
And once again, let me stress how easy this recipe was. The part that took the longest was peeling and slicing the potatoes. It was so easy, I threw it together on Sunday afternoon in between church and driving 45 minutes to an afternoon swim meet I had Mamma at home to add the cream if we weren't back in time for that, but as it was, we were. I had Mamma add the cream anyway, and I took Jupiter for a walk before dinner.

And it was super rich and delicious.

The second recipe I want to share is No-Knead Dinner Rolls from the Pioneer Woman. Another super easy, super delicious find.

 I made these almost exactly as directed. I did halve the recipe, and it still made 24 rolls. I also used almond milk instead of milk, because we had a dinner guest that couldn't tolerate any dairy whatsoever. And I topped them with margarine instead of butter for the same reason.

Photo is from the Pioneer Woman herself, because you know she takes way better photos than I do:

Tuesday, November 26, 2013

Two for Tuesday: GF Cheese Rolls; Snow Peapods

Both of these recipes come to me via Christopher Robin, who knows my google-fu skills are weak. I have no where she originally found them.

Sweet Tiff from co-op was kind enough to bring me a bag of tapioca starch (same thing as tapioca flour). That saves me from hunting it down at the grocery store!

GF Cheese Rolls....better known as
 Brazilian Cheese Bread
                                                                      ...who knew?

Simple and gluten-free Brazilian cheese bread, or Pão de Queijo, made with tapioca flour, milk, eggs, olive oil, and cheese.

The recipe as presented is fairly basic. Feel free to dress it up a bit with herbs or spices of your choice.
•    Prep time: 5 minutes
•    Cook time: 15 minutes

Ingredients
•    1 egg*
•    1/3 cup olive oil
•    2/3 cup milk
•    Scant 1 1/2 cups (170 grams) tapioca flour
•    1/2 cup (packed, about 66 grams) grated cheese, your preference, though we got the best results from Mexican farmer's cheese - queso fresco
•    1 teaspoon of salt (or more to taste)
Special equipment recommended:
•    One or two mini muffin tins. Mini muffin tins are about half the size of a regular muffin pan. The muffin openings are about 1-inch deep, and 1 3/4 inch wide at the top.
*It helps when baking with eggs to start with eggs at room temperature. If you don't plan ahead (that would be me, usually) you can put the egg in a bowl of warm water for a few minutes to gently take off the chill of the fridge.

Method

1 Preheat oven to 400°F. Grease a mini-muffin tin. Put all of the ingredients into a blender and pulse until smooth. You may need to use a spatula to scrape down the sides of the blender so that everything gets blended well. At this point you can store the batter in the refrigerator for up to a week.

2 Bake in the oven for 15-20 minutes, until all puffy and just lightly browned. Remove from oven and let cool on a rack for a few minutes.

Eat while warm or save to reheat later.

Note that Brazilian cheese bread is very chewy, a lot like Japanese mochi.

Yield: Enough batter for 16 mini muffin sized cheese breads.

******

Mushrooms and Snow Pea Pods
When making this for my family on Thanksgiving, I think I will have to omit the mushrooms. I do want my children to at least try it! I'll half all the spices and broths and such to reflect the reduced volume. But what I'm posting here is the original recipe, with its original amounts.

Ingredients:
  • 6 oz mushrooms, button, fresh
  • 6 oz pea pods, fresh or frozen
  • ½ t sugar
  • 1 t salt
  • 1 t sherry
  • 2 T chicken broth
  • 2 T cooking oil
Directions: 

  1. Stir fry oil and pea pods for one minute.  Add mushrooms and stir fry additional minute.
  2. Add salt, sherry, and sugar, stir fry one minute.
  3. Add broth, stir fry one minute.
  4. Serve immediately.

Tuesday, November 12, 2013

Two for Tuesday: Gaming Recipes

This first recipe was discovered by the Jedi at a potluck at work. It was appropriately called "Crack Dip" for it's additive qualities. He brought the recipe home along with an injunction that we must make it on our next gaming night.

We did.

It was well received. And very well named.

It isn't healthy. Not even remotely. Don't come here for healthy recipes.

Crack Dip

Ingredients--
  • 1 lb. Bob Evans sausage regular or hot (red wrapper)
  • 2 blocks cream cheese cubed – do not use low or no fat (why would you even consider that?)
  • 1 can Rotel tomatoes with diced chilies – do not drain
Directions--
  1.  Brown sausage in pan. (Usually grease is cooked off but drain if needed.)
  2. Add cream cheese and Rotel tomatoes.
  3. Blend until creamy smooth. (Can be transferred to a crock pot to be kept warm.)
  4. Serve with tortilla chips. (The 'scoops' variety works very well.)
I don't have a picture. Sorry. Don't come here for pictures either.

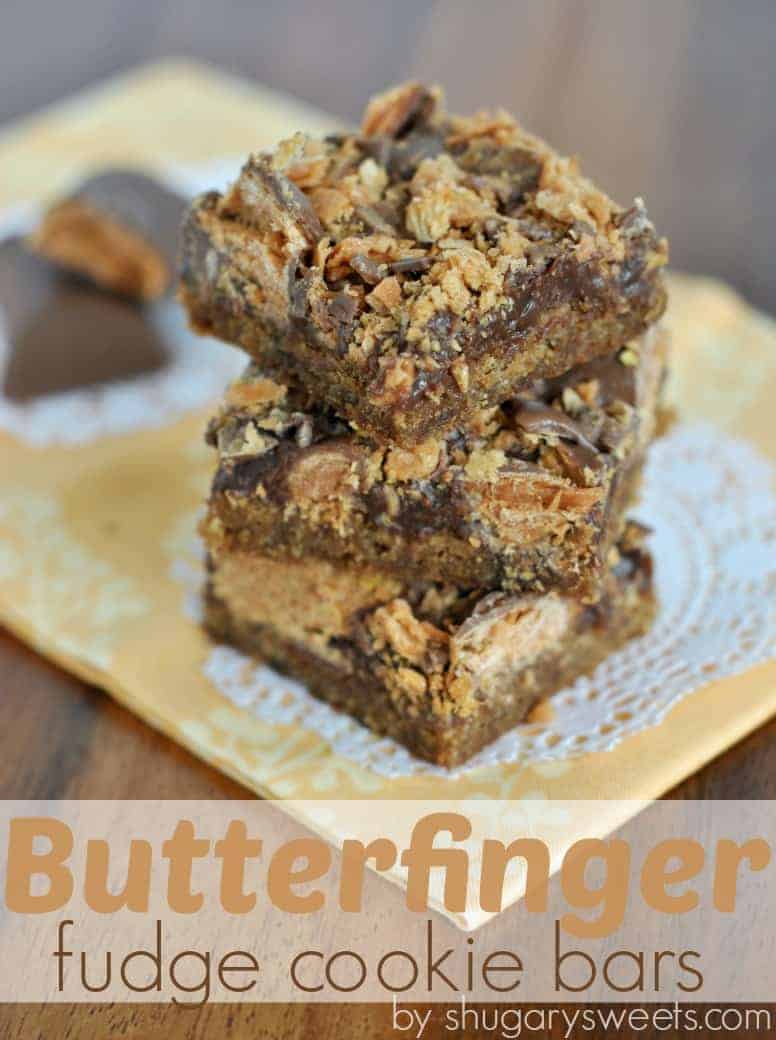
This next recipe I have for you comes from ShugarySweets, which is my new favorite source of dessert and snack recipes. I didn't change anything, not a thing, from her directions. They were perfect and the treat was sinfully good.

So, pretty much, I'm bringing you crack and sin today.

I 'm just going to give you a link to her outstanding recipe and steal a picture from her blog so that you know how much you need to visit her blog and make this recipe. It does make a lot, so be prepared to take it to a pot luck, or cut up the leftovers and make little thank-you presents for teachers or secretaries or something.

Trust me, you won't regret making these. Your waistline might regret it, but I can't help that.

Tuesday, September 10, 2013

Two for Tuesday: Strawberry Lemonade & Peanut Butter Pie

Two for Tuesday is back!

One of my goals for myself while I'm on a self-imposed Facebook fast is to get back to regular posts on my blog.

Thus, the return of Two for Tuesday :)

First up..... strawberry lemonade.

This stuff is to die for! We had some strawberry lemonade at Longhorn Steakhouse (where we went for our anniversary dinner.) It was yummy, so I found a recipe on my phone. We stopped and picked up strawberries and lemons on our way home. The next day was Saturday. The Jedi ran the smoker and put three racks of ribs in. We had another family over for dinner, and I made this strawberry lemonade.

The drink we had a Longhorn was good.....the homemade stuff was much much much better.

Warning, it can be a bit labor intensive, so I recommend recruiting a couple of children to help. I'm all about free child labor.

Ingredients
  • 1 1/2 cup sugar, divided
  • 4 cups water, divide
  • 2 cups fresh strawberries, hulled
  • 1 cup fresh lemon juice (4 to 5 lemons)
Directions

  1. Combine one cup of sugar and one cup of water in a small sauce pan. Heat and stir until sugar is dissolved and mixture is clear. Remove from heat and let it cool.
  2. Rinse and hull your strawberries. (Or give this task to an older child to be working on while you are making the sugar syrup.)
  3. Put strawberries and one cup cold water in a food processor. Run it till the mixture is pretty smooth. Transfer to a pitcher and stir in 2 more cups of cold water.
  4. Cut your lemons in half and juice them. THIS IS NOT THAT HARD, even without a fancy juicer. Check out this video on how to juice lemons with a fork. (And again, grab a couple of kids to help.)
  5. Pour the cup of lemon juice and the cooled sugar syrup into the pitcher and stir.
  6. You may know chill the mixture for up to 8 hours. (It will need stirred again before you pour it.) OR you can serve it right away. 
  7. Either way, when you are ready to serve, fill clear glasses two-thirds full with ice. (Yes, the glasses do need to be transparent; this is too pretty to hide behind opaque plastic.) Then pour your homemade strawberry lemonade over the ice. I like to pop a pretty colored straw in the glasses too. This will make enough to fill 8 glasses. 
And my second recipe for the day is...peanut butter pie. 

This one is nice for these last dog days of summer because it doesn't require much, if any, baking. I threw this together at the last minute when I needed something to take to a friend's house. I didn't have a prepared graham cracker crust on hand, so I made one. Sweetling and the Jedi don't care for chocolate, so using Oreos as a crust wasn't an option. (I did have heavy cream on hand. I pilfered the Jedi's ice cream making ingredients and bought another carton for him from the store the next day.)

Here's the recipe I used, and aside from swapping out the crust, I followed it and it worked perfectly. It's late, and I'm lazy, so I'm just going to post a link.

I didn't put shaved chocolate on the top, but I did make the hot fudge sauce to put on slices. The hot fudge sauce was ok, but it wasn't Heggy's. I'm still on a quest to find a hot fudge sauce recipe comparable with Heggy's. I also made a strawberry sauce from scratch, for the non-chocolate lovers....but I was told that the strawberry did not go with the pie as much as I thought it should. I was told that caramel would have been a better topping option. 

Tuesday, March 12, 2013

Two for Tuesday: Chef Sweetling

We try to periodically do a kid's cook night. I'd like it to happen once a week, but the reality is more like every other week.

Still, it's a great tradition. Not only is it a great learning experience, but it's a real confidence builder for each of my children.

Sweetling and I were at Meijer on Saturday. We were on our way home from a women's self-defense class and had gone in to look for an ink cartridge for our color printer. It was lunch time, and we were hungry, so we decided to swing through the grocery section to look for a few yummy food samples.

Little samples of baked salmon were being given out...along with a 10% off coupon, a little fish-thickness measuring ruler, and a pamphlet on easy, fool-proof fish cooking techniques.

Meijer didn't have the ink cartridge we needed, but at Sweetling's request, a large "family" pack of a salmon fillet weighing 1.3 lbs came home with us.

Baked Salmon


Ingredients:

  • salmon
  • seasoning of choice

Directions:

  1.  Preheat oven to 450.
  2. We lined a rimmed baking sheet with parchment paper. I have no idea if this is necessary, but I didn't want to be scraping fish chunks off the baking tray.
  3. Place salmon on tray. (I know this is complicated, but just bear with me.)
  4. Season. (I just put out all my seasoning blends and let Sweetling go at.)
  5. Bake for 10 minutes per 1 inch thickness. (We baked ours a little longer, because we had never baked fish before and I was worried it would be underdone. It wasn't. In fact, we overbaked ours a tiny bit and it was a touch dryer than it could have been.)
  6. Sweetling served her fish with butter noodles, microwaved broccoli and cheese, and homemade corn muffins....

Homemade Corn Muffins


Really, Sweetling made these before making the fish. She cleaned up her mixing area while they were in the oven. She also started the water boiling for the butter noodles. When they came out, she put them in a basket lined with a tea towel and put another clean towel on top of them to keep them warm. By that time, her noodles were ready to go in the water. Then she seasoned her fish and popped it in the oven. She got the broccoli in the microwave and turned off the noodles while the fish baked. The timing would have been perfect if Mommy hadn't insisted the fish stay in the oven well past its bake time. In the end, she looked up the proper internal temperature for cooked salmon and stuck a meat thermometer in the fish to prove to me that it was just fine.

Ingredients:

  • 1 cup flour
  • 1 cup cornmeal
  • 1/2 cup white sugar
  • 2 tsp baking powder
  • 1 tsp salt
  • 1 cup buttermilk (we keep buttermilk frozen in 1/2 cup amounts. We thawed the buttermilk in the microwave for this recipe.)
  • 1/2 cup butter, melted
  • 1 egg, beaten

Directions:

  1. Preheat oven to 400 degrees.
  2. Mix all dry ingredients in a large bowl. 
  3. Add wet ingredients and stir with wooden spoon till combined.
  4. Spoon into paper lined muffin cups.
  5. Bake for 15 minutes.


Two for Tuesday: Pork Chops with Fruit Stuffing and Cookie Dough Ice Cream

The first recipe is part of a quest to find at least four but preferably six delicious and easy crock pot recipes for the Mondays where we're gone all day at co-op. (I don't see how work-outside-the-home mothers manage dinner every night, I really don't.)

The grown-ups in the house liked this recipe. The kids in the house thought the stuffing was "strange". I don't know yet whether the recipe wants to become part of our regular menu or not.

The original recipe came from Pillsbury Slow Cooker Recipes, which came home with us from the library. I modified it in a vain attempt to better customize it to my family's taste. I also increased the amounts from the original.


Pork Chops with Fruit Stuffing


Ingredients--


  • 1 1/2 cup diced dried apples
  • 2 cups chicken broth OR 1 1/2 cup no salt added chicken broth plus 1/2 cup water
  • !/2 to 1 cup apple juice
  • 6 Tbs butter
  • 1/4 to 1/2 tsp cinnamon
  • 2 (6 oz) pkg low-sodium stuffing mix
  • 6 pork chops
  • vegetable oil and butter for frying
  • Mrs Dash

Directions--

  1. In large pot (my biggest saucepan wasn't quite big enough), combine diced dried apples, 1/2 cup apple juice, chicken broth, butter, and cinnamon. Bring to a boil and stir in stuffing mix. Remove from heat. (Add a tiny bit more apple juice if needed to moisten.)
  2. Heat a little vegetable oil and a pat of butter in large skillet. When hot and bubbly, but before the butter browns, add pork chops. Fry on high heat for a minute or two on each side, just enough to brown them. Season with Mrs. Dash.
  3. Pour 1/4 cup apple juice in slow cooker. (Just enough to cover the bottom). Place pork chops in slow cooker. Top with stuffing.
  4. Cover and cook on low 5 to 6 hours.
  5. To serve, transfer stuffing to a serving bowl and fluff with a fork.
  6. Good with sweet potato fries or baked sweet potatoes as a side dish!


 Cookie Dough Ice Cream


In our house, we make our own ice cream. We make one or two gallons a week. (And when I say "we", I really mean the Jedi does it all.) It's not that much more expensive than store bought. It's certainly more delicious, and we get to experiment with all sorts of flavors!

This came from Toa of Boy's request for chocolate chip cookie dough ice cream. I picked up refrigerated cookie dough from the store, thinking that refrigerated cookie dough had been pasteurized and was safe to consume raw. I was wrong. The Jedi noticed all sorts of "do not consume unbaked" warning labels on it. Luckily, I found a great substitute recipe on Allrecipes. (This doesn't include the directions or the ingredients for the ice cream itself, just the mix in!)

I changed nothing from the recipe except to double it for my ice cream loving family. The amounts below are for the family-sized batch!


Ingredients:

  • 1 cup flour
  • 5 Tbs brown sugar
  • 3 Tbs white sugar
  • 4 Tbs softened butter
  • 1/4 tsp vanilla extract
  • 4 Tbs water
  • mini-chocolate chips

Directions:

  1. Cream butter with sugars until smooth. 
  2. Stir in vanilla and water.
  3. Mix in flour until well blended.
  4. Stir in mini-chocolate chips. Yeah, I didn't measure. I just poured and stirred until it looked right. You have to use the mini-chips though, because the regular sized chips get way too hard in the ice cream.
  5. Turn out onto parchment paper and shape into a rough log.
  6. Freeze for 1 to 2 hours then cut into chunks to stir into the ice cream. (We also at that time added extra mini-chocolate chips to the mix-in process.)

Wednesday, March 06, 2013

Two for Tuesday: Weekly Menu

Once or twice, I've tried to plan out my dinners for an entire month and do a once a month approach to grocery shopping. It looks great on paper. At my house, it falls apart in practice.

For one thing, life happens. Things come up. There's a last minute schedule change. Etc. Etc. Then what I had planned for a Wednesday doesn't work, so I'll shift Friday's dinner to Wednesday. Then come Friday I don't feel like making Wednesday's lasagna from scratch, so I'll shift Sunday over....and the whole menu just becomes a mess of penciled in arrows.

For another thing, once a month grocery shopping doesn't work for us. There's always a few ingredients I forget. Or there's a few fresh ingredients that must be picked up a day or two before a meal is cooked. And anyway, we need milk, bread, and eggs each week. The once a month approach becomes one big headache of a grocery trip, followed by lots of little annoying trips.

 Don't get me wrong. I know many families use a monthly meal plan and a once a month grocery trip and it works great for them. I'm not knocking the system.

It just doesn't work for me.

But, planning a weeks worth of dinners, that does work. I sit through Toa of Boy's Tae Kwon Do class on Tuesday, plan my menu, pick out recipes, and make up a grocery list. (Mostly. Mostly I do.)

Wednesday morning is my grocery run. My grocery run used to be Thursday mornings. But there's often still trash cans at the end of the drive from the Thursday morning pick up, and I got tired of backing into them with the van, so I switched grocery shopping to Wednesday. It was a good decision.

Here's this week's menu. Two of the recipes are from a couple books I grabbed at the library. Sadly, over half the recipes in each book seem to call for cans of condensed soup. Since I went looking for new recipes which are lower in sodium, this was a disappointment. Still, I found a couple which I want to try, and internet links for them as well!

Wednesday: Chicken Pot Pie (this does have a can of soup. I haven't yet reworked it. Campbell's has a Healthy Request soup that's a tiny bit lower in sodium.)

Thursday: leftovers

Friday: (potluck) Pecan Chicken Casserole from Taste of Home Potluck

Saturday: Kielbasa Spaghetti (no recipe, just a picture for inspiration)
Sunday: Kid's Cook? I had this brilliant idea to have the kids cook dinner. But I haven't told my brilliant idea to my kids yet, so no recipe has been picked out for this day.

Monday: Pork Chops with Spiced Fruit Stuffing. This does call for chicken broth and stuffing mix, but I can purchase no-salt added chicken broth and low sodium stuffing.  Came from Pillsbury's Slowcooker Recipes


Lastly, I leave you with one other new recipe. I made this Almost Lasagna for dinner tonight, and it was quick and yummy. The recipe calls for cooked pasta, but doesn't include the cooking time in the instructions. However, if you get your water going first and then start browning your meat, you can toss the pasta in as soon as the water comes to a boil. The pasta should be ready by the time you've browned your meat and mixed your eggs and ricotta. I did throw extra Italian spices in with my meat as it browned and in with my ricotta cheese mixture.

Sunday, February 24, 2013

Two for Tuesday: Potatoes

I don't even care that it's Sunday. Sue me.

 I'm posting my Two for Tuesday recipes up anyway because if I wait for Tuesday, I won't have time to write.

Anyway, potatoes and I have a love-hate relationship. I love potatoes. They hate me and refuse to cook. Really. Not even in the microwave. Our relationship is that disfunctional.

The fact that I cooked two yummy potato dishes this week is nothing short of amazing. I want to write down the recipes so I remember them. They both originally came from All Recipes, but I modified them to reduce the sodium and to match the ingredients I had, so these are the modified versions.

Leek and Potato Soup


Ingredients:

  • 1 cup butter
  • 2 leeks, sliced and rinsed
  • 1 quart broth or stock, low or no-sodium
  • 1 Tbs cornstarch
  • 4 cups potatoes, peeled and cubed
  • 2 cups milk
  • 3 thick slices Velveeta cheese
  • Mrs. Dash to taste 
  • shredded cheddar cheese for garnish

Directions: 

  1. In a large pot, melt butter. Cook leeks until tender. 
  2. Stir cornstarch into 1 cup of broth so that there are no lumps. Add to rest of broth and again, stir out lumps. Add mixture to pot while stirring. (When I made this soup last week, I used some ham drippings I had saved from a previous dinner and added enough water to make 1 quart. This was far from a low sodium option, I know.)
  3. Add the potatoes and bring to a boil. Add Mrs. Dash to taste. Pour in the milk, reduce heat and simmer for 30 minutes until potatoes are cooked through. Add cheese slices and stir until melted. 
  4. Serve and garnish with shredded cheddar cheese.

 (This next recipe was originally "potatoes au gratin" , but the Jedi won't eat any dish with a French name.)

 Cheesy Potatoes


Ingredients


  • 6 medium potatoes, peeled and sliced
  • half an onion sliced and separated into rings (or 1 whole onion)
  • LOTS of Mrs. Dash
  • 1/4 cup butter
  • 1/4 cup flour
  • 3 cups milk
  • 2 1/4 cup shredded cheddar cheese

Directions

  1. Preheat oven to 400. Butter a 2 quart casserole dish.
  2. Place a layer of potatoes in the casserole dish. Season generously. Place another layer. Repeat. When you've used half the potatoes, place a layer of onion rings. Then continue with seasoned layers of potatoes.
  3. In medium sized sauce pan, melt butter over medium heat. Add flour and whisk for at least one minute. 
  4. Add milk and stir until thickened. Season to taste.
  5. Add cheese and stir until melted.
  6. Spoon sauce over potatoes.
  7. Cover with aluminum foil and back for 1 and 1/2 hours. 


Tuesday, January 08, 2013

Two for Tuesday: Chicken Parmesan and Knock You Naked Brownies

Look at me, writing a blog post like a good girl instead of squeezing in some Dragon Age playing time before Tae Kwon Do tonight.

You're welcome, world.

I made this last night, and it turned out great! I modified a recipe from Pioneer Woman. She has an amazing looking dish that I'd highly recommend trying as is. But, since Toa has some tomato allergies, I couldn't use her made from scratch in 20 minutes sauce. Also, Mamma has high blood pressure, and since I'm already getting a lot of sodium in the canned sauce, I switch to a Mrs Dash blend for my seasoning, rather than the salt a pepper approach used by Pioneer Woman.

Here's my take on

Chicken Parmesan


Ingredients


  • 4-6 boneless, skinless chicken breasts
  • Mrs Dash, chicken blend
  • flour, maybe a 1/4 cup?
  • 28 oz jar of spaghetti sauce (we use LaRosa's, because we live in Cincinnati and are awesome like that)
  • Parmesan cheese, real stuff, not the powder in a can
  • pasta of your choice 

Directions

  1. Start a pot of water boiling for your pasta. Pour a tablespoon or so of oil into the pot to keep your pasta from sticking together.
  2. Place the chicken breasts in a large ziplock bag. You can fit 4 in a gallon sized bag. Lay the bag flat on your table or counter, and make sure each chicken piece is flat and not overlapping each other. (You can cheat and hop over to pioneer woman for a picture. She has great food pictures.)
  3.  With the flat side of a kitchen mallet, pound the snot out of your chicken. You want each piece of chicken down to about a quarter of an inch of thickness. 
  4. Transfer your chicken to a plate and sprinkle the Mrs. Dash chicken blend on each side.
  5. On another plate mix about a quarter cup of flour with more of the Mrs. Dash chicken blend. No, I didn't measure it. In fact, I let Toa of Boy do this step. 
  6. In a frying pan, heat a little olive oil and add a pat of butter. Yes, a little and a pat. You can do it. Don't obsess over perfection.
  7. (When your water is boiling, go ahead and toss your pasta in to cook. Remember to stir it occasionally.)
  8. Dredge your chicken pieces in your flour mixture and coat them completely. 
  9. Brown them in the skillet. Get them nice and golden brown and crispy on each side. Yum yum. 
  10. Transfer them to a clean plate. (I find it's easiest to flip them and transfer them with a meat fork rather than a spatula, but that's just my preference.
  11. Now, if your family likes wonderful things like onions, you could saute some in your skillet. My family would be traumatized by things like onions or vegetables in their sauce, so I didn't do any sauteing.
  12.  I drained off the extra oil from my skillet, but left the crunchy bits of breading in the skillet.
  13. Pour at least one large jar of spaghetti sauce into your skillet. Stir and heat till hot, but not quite bubbling.
  14. Carefully place your chicken pieces on top of your sauce. Top with grated Parmesan cheese. Lots of it. Cover the skillet and simmer on low heat to let the cheese and the chicken finish cooking through if needed.
  15. How's the pasta? Ready to drain maybe?
  16. Let the chicken and sauce cook for 8-10 minutes. Put more delicious cheese on top of the chicken. Melt it with the lid on the top for just another minute or so.
  17. Serve a nice piece of chicken beside or on top of a dish of pasta. scoop some sauce out of your pan to spoon over the pasta, but for heavens sake don't cover your wonderful looking chicken with it!
Also this week, from Pioneer Woman, I made Knock-You Naked Brownies. I'm not going to reprint her recipe here. Do everything she says EXCEPT by all means use a full cup of chocolate chips. Not 1/3 of a cup. Really, I can't believe Ree  actually claims there is such a thing as too many chocolate chips. My opinion of her is forever tainted. 

Tuesday, December 04, 2012

Two for Tuesday...mmmmm....brownies

Let me start today off with the BEST BROWNIE RECIPE EVER.

Do I have your attention?

Good.

'Cause these are the BEST BROWNIES EVER.

Best Brownies Ever


Ingredients:
  • 1/2 cup butter
  • 1 cup white sugar
  • 2 eggs
  • 1 tsp vanilla
  • 1/3 cup cocoa
  • 1/2 cup flour
  • 1/4 tsp salt
  • 1/4 tsp baking powder
Heavenly Fudge Top Layer: (You must make this. Must.)
  • 3 tablespoons SOFTENED butter 
  • 3 tablespoons cocoa
  • 1 tablespoon honey
  • 1 tsp vanilla
  • 1 cup powdered sugar
 Optional:
  • cute seasonal sprinkles, or, in the fall, reeces pieces candy. (I say in the fall cause the orange and yellow of the reeces pieces just says 'fall' to me.)
Directions:
  1. Put 3 tablespoons of butter out to soften. You'll use this for the fudge top layer. (Don't be a dork and try to soften it in the microwave. You know you're just going to melt it and that won't work. Be patient and let the butter soften for real.) 
  2. Preheat your oven to 350. 
  3. Grease and flour an 8 inch brownie pan. (By all that's holy, I can't keep typing. I want to go back and double everything in the recipe and tell you to grease and flour a 9x13 cake pan. That's what I've done every time I've made them. None of this self restraint crap of a dainty little brownie pan. OK, if you are taking these anywhere, go for broke and double the recipe. People will gobble them up and an 8x8 pan is just a tease. However, if you are just making this for the family and you yourself want to continue to fit in your jeans, leave the recipe as is. There will be NO RESISTING these brownies, so don't make a big pan and then come crying back to me when the whole pan is gone and you were the only one in the house.)
  4. Melt the 1/2 cup of butter in a large saucepan. 
  5. Remove from heat and stir in the sugar, eggs, and vanilla. 
  6. Thoroughly mix in the cocoa, flour, salt, and baking powder.
  7. Pour/spoon batter into your prepared pan, of whatever size you chose. I won't judge you.
  8. Bake at 350 for 25 to 30 minutes. If the chocolate spirits smile on you, the brownies will not be overbaked or underbaked. 
  9. Combine the heavenly fudge frosting ingredients. (Butter, cocoa, honey, vanilla, powdered sugar). Spread over the brownies while they are still warm. (The fudge topping will be thick...as in unspreadably thick. Use your fingers if you need to mush it on like playdough. The warm brownies will make it pliable and it will smooth out. Promise.)
  10. If you're feeling especially festive, immediately sprinkle some candy or cake sprinkles or such over the top of the fudge layer.
  11. Let the brownies cool completely before cutting into them. Seriously. Otherwise they are goop. These are too good to be made into goop. Don't make me come after you for cutting into your brownies too soon.
And yes, this is just one recipe. But its SO GOOD I don't even need to put a second recipe up for today.

Tuesday, November 13, 2012

Two for Tuesday: Thanksgiving Favorites


Let's be honest. Everyone has certain dishes that just must be on the table in order for Thanksgiving to feel real.

Yeah, yeah, it's all about stopping and counting our blessings. We do that. I promise.


And then it's all about eating.

Here are two of my must haves. (Other than a smoked turkey, which the Jedi is forever more obligated to provide for me. This year, he's adding burnt ends to the meat menu as well. Mmmmm....burnt ends......)

Sweet Potato Casserole


Ingredients:

  • 6 whole sweet potatoes ~3 lbs
  •  3/4 cup sugar
  •  1/3 cup milk
  •  1/4 cup butter  (melted)
  •  1 tsp vanilla
  •  1/2 tsp cinnamon
  •  1/2 tsp nutmeg
  •  2 whole eggs (lightly beaten)

 Topping:

  •  1/3 cup packed brown sugar
  •  1/3 cup chopped pecans
  •  2 tbsp flour
  •  2 tbsp soft butter

Directions:


  1.  Boil sweet potatoes for 30-40 minutes. Let cool, peel and mash. (I generally do this the day before. It's just easier. You can store them as is. Or you can mix up the casserole, put it in the fridge, and then bake it the day you need to serve it.)
  2.  Combine mashed sweet potatoes with sugar, milk, melted butter, vanilla, cinnamon, and nutmeg (ie--everything except the topping ingredients). 
  3. Spoon into greased 2 quart casserole.
  4. Combine topping ingredients, cutting in the butter until crumbly. (I might be guilty of doubling the topping amounts when I bake this. Twice the sweet stuff. Yum. Yum. Knowing that not everyone is enlightened enough to want a dessert item on their dinner plate, the amount given in the recipe above is for the more moderate version.) Sprinkle over casserole before baking. 
  5. Bake at 350 for 30 minutes (casserole should be steaming hot in center). If you're pulling it out of the fridge to bake it, plan for a 40-50 minute bake time.

One year, I accidentally put the spices for pumpkin pie (1 tsp cinnamon, 1/2 tsp allspice, 1/2 tsp nutmeg) in the casserole and Vaya liked it better this way. More recently, I've been leaving out the nutmeg altogether because Toa of Boy likes it better with just cinnamon. So, feel free to adjust the spices some.

The second Thanksgiving must have is a pumpkin pie. Like, cook it from a pumpkin, pumpkin pie.

I'll include the cook it from the pumpkin directions after the pie recipe.

I'm all about logic. Ask Sweetling. She'll vouch for me on that.

Deep Dish Pumpkin Pie

Ingredients: 

  • 1 - 3/4 cup flour
  •  1/3 cup brown sugar (firmly packed)
  •  1/3 cup sugar
  •  1 cup cold butter/margarine (cut into pieces)
  •  1 cup chopped nuts (walnuts or pecans, but why would you pick walnuts over pecans?)
  •  16 oz pumpkin (or 1-3/4 cup of real pumpkin, baby!)
  •  1 can sweetened condensed milk (14 oz)
  •  2 whole eggs
  •  1 tsp ground cinnamon
  •  1 tsp ground allspice

 Directions:


  1. Preheat oven to 350° F.
  2. In a medium bowl, combine flour and sugars. Cut in butter or margarine until crumbly. Stir in nuts.
  3. Reserve 1 cup of the crumb mixture. Press the remainder firmly on the bottom and halfway up the sides of a 12 x 7 inch baking dish. (Or a deep dish pie pan, but it has to be really deep dish.)
  4. In a large mixer bowl, combine remaining ingredients (except reserved crumb mixture, dur!) and mix well. Pour into prepared dish. Top with reserved crumb mixture.
  5. Bake for 55 minutes or until golden brown.
  6. Cool. Serve with vanilla ice cream if you'd like. (You'd like, trust me, you'd like.)
 Ok, And, because I said I would, here's how, in the past, I've cooked my pumpkin. The Jedi's mom taught me this method. I like it better than boiling the pumpkin, but I don't like how it makes my house smell. You have been warned.

Baking a Pumpkin

  1. You need a pie pumpkin, a baking dish, and a cup of water. Rinse the outside of your pumpkin. Scrub off any dirt.
  2. Cut your pie pumpkin in half. I'm not sure it matters how you cut it in half, but I find it easiest to let it sit on it's pumpkin bottom and then I saw it in half close to its stem on top.
  3. Scoop out the seeds and pulp.
  4. Lay the pumpkin cut side down in the baking dish. Pour enough water into the baking dish to have about a quarter inch or so in the bottom.
  5. Bake at 350 for about an hour. It needs to be tender when you stick it with a fork. 
  6. Remove it from the oven and let it cool.
  7. When its cool, scrape the soft meat out of the pumpkin skin.
  8. Now, some instructions will tell you to send it through the food processor. Like I'm going to climb up on the counter to drag that thing out of the top shelf of the cupboard. I don't think so. I just mash it up like I would a potato and use it as is. 
  9. You do need to store it in a plastic container in the fridge till you need it for a recipe. It also freezes well. 
I have two pumpkins sitting on my kitchen floor. One of them is going into a pie. I think the other wants to go into some dough for cinnamon rolls sometime after Thanksgiving.

Tuesday, October 30, 2012

Two for Tuesday: Fall Apple Favorites

Fall is the time for apples. Even Amelia Pond thinks so....

Today's recipes are all about apples.

The first recipe is a fast and easy dip to make to serve with wedges of crisp fall apples...

Peanut Butter Apple Dip

Ingredients:

  •  8 oz cream cheese (softened)
  • 1 cup creamy peanut butter
  • 1 cup firmly packed brown sugar
  • 1/4 cup milk

Directions:

  1.  Use a blender mix cream cheese and peanut butter. Add brown sugar and milk and mix.
  2. Serve!

See, you can't get much simpler than that. Oh, and refrigerate your leftovers. If you have any. Makes a great party treat.

The next recipe is more time consuming, but well worth it. It comes, with a few variations, from an old Better Homes paperback cookbook. I've used this particular recipe so much that the cookbook practically falls open to this page.

Crumble Nut Apple Pie

Ingredients: 

  •  1 cup sugar, divided
  • 2 Tbs flour
  • 6-7 cups thinly sliced, peeled Granny Smith apples 
  • cinnamon (you need 1/4 tsp for the filling and 1/2 tsp for the topping)
  •  pastry for single crust pie (you can use a refrigerated crust that you roll out or make your own)
  • 1/2 cup flour
  • 1/4 cup butter
  • 1/4 cup finely chopped pecans (or bump it up to 1/2 cup if you love pecans)

Directions:

  1. Preheat oven to 375.
  2. Combine 1/2 cup of the sugar with the 2 Tbs of flour and 1/4 tsp of cinnamon. Sprinkle apple slices with the sugar/flour and stir.
  3. Roll out pie crust. Place into 9 inch pie dish. Crimp edges.
  4. Combine remaining 1/2 cup of sugar with 1/2 cup of flour and 1/2 tsp cinnamon. Cut in butter until crumbly. Stir in chopped pecans.
  5. Spoon apple mixture into prepared pie crust. Top with crumble mixture.
  6. Cover edges of crust with strips of foil and bake at 375 for 30 minutes. Remove foil and bake another 30 minutes.
  7. Let the pie cool for an hour, but serve it while its still a little warm. It's delicious topped with vanilla ice cream and caramel sauce.
Happy Fall Y'All!

Tuesday, October 02, 2012

Two for Tuesday: Delicious Shredded Beef

The downside to being a certified Kansas City Barbeque Society judge is that the last time I made what used to be a favorite "bbq pulled pork" in the crock pot, I was completely disgusted at how soggy, mushy, and bland the whole thing turned out.

In short, I lost what used to be a quick and easy, crowd pleasing dinner option.

Curse you, refined taste buds.

However, in my search for an easy crock pot dinner, I decided to give the slow cooker one more chance at making a nice and easy dinner sandwich meat option.

I'm not happy with the string of adjectives at the end of that last sentence. And yet, I'm not unhappy enough to go back and fix them.

This is why I will never write a novel.

ANYWAY---

I came up with this great sandwich ALL BY MYSELF. I can't craft a good sentence, but I totally nailed this recipe!

Slow Cooked Shredded Beef

Ingredients:


  • 2 to 3 lbs beef chuck roast (another cut might also work, I just grabbed what was on sale)
  • 1 onion
  • garlic
  • chili powder
  • cilantro
(Also needed for serving/assembling sandwiches)
  • buns
  • sliced cheese (we like provolone or colby jack)
  • a favorite bbq sauce, warmed

Directions:

  1. Slice one or two onions into the bottom of a slow cooker. 
  2. Rinse off beef and pat dry. Sprinkle both sides with just a hint of garlic followed by a solid dusting of chili powder and a little bit of cilantro.
  3. Place beef in slow cooker. Cook on high for 1 hour and on low for 8-9 hours. 
  4. Remove beef from slow cooker. Allow to rest for 30 minutes. Shred with two meat forks.
  5. Place shredded meat in a serving bowl and drizzle with juice from the crock pot. 
  6. Remove onions from crock pot and place in another small bowl.
  7. Assemble sandwiches on a bun with a slice of cheese, some onions (if desired), a generous amount of meat, and a spoonful of bbq sauce on top.
To finish off this meal, I scrubbed, pierced, and microwaved a few sweet potatoes. They were delicious sliced in half lengthwise and served with a generous pat of butter and a sprinkling of brown sugar.


Tuesday, September 25, 2012

Two for Tuesday: Chicken Dinners

There are no pictures.

Know why?

Because even with my new camera, my food photos just aren't great. Instead of presenting a visually appealing, appetizing picture of the food. Which is a shame, cause the food is good.

In short, if a picture is worth a thousand words, my food photos have overdrawn their accounts.

Yeah, my mixed metaphors aren't the greatest either. Too bad. You're stuck with those.

Today, I bring you two great chicken dinner recipes. 

Or, more accurately, I bring you one I know is great, and the other that I writing out from memory and hoping it's pretty accurate. May the Force be with you on that one.

The one I know works:

Slow Cooked Roasted Chicken


I'm experimenting with crock pot recipes on Monday. We're gone all day on Monday to co-op, so having something in the crock pot that's ready to go when we get home is awesome. Sadly, a lot of crock pot recipes call for cans of condensed soup and packets of dry soup mix and other such shortcuts that are way too high on sodium for me to use.

I'm being brave and inventing my own variations. This one was delicious. I served it with microwaved baked potatoes and broccoli and cheese.

Ingredients:

  • chicken leg quarters (one per every 1-2 people
  • Mrs Dash's chicken grilling blend
  • vegetable oil for frying
Complicated list there, I know, but bear with me.

Directions:

  1.  Heat oil in a large skillet. I don't know how much. Pour some oil in your skillet and heat it up. This isn't rocket science.
  2. When your oil is nice and hot, put in your chicken leg quarters, one or two at a time. Let them brown nicely on one side, then flip them over. You aren't cooking them, just browning them. It should only take a few minutes.
  3. While the chicken is browning, crumple up some balls of aluminum foil and place them on the bottom of your slow cooker. The goal is to keep the chicken two to three inches off the bottom of the cooker while allowing some space for the juices to pool.
  4.  Season both sides of your nicely browned chicken quarters with Mrs. Dash's blend for grilling chicken. Place the chicken in the crock pot.
  5. Cook on high for one hour, then cook on low for 6-8 hours. Or, you could just cook it on low for 8 hours I bet. 
The chicken comes out tender and juicy, without being fall off the bone over done or mushy from sitting in its own broth. I refrigerated the broth and used it in soup I made later that week. If I had been thinking, I would have put some wheat bread in the bread machine to serve with the dinner as well. Still the potatoes and the broccoli rounded out the meal quickly and easily.

Second recipe--

Chicken Pot Pie

It's been a while since I've made this. Hopefully, I'll remember how it goes. But Vaya the Elf was asking for this recipe, so here it is. 

Ingredients:

  • precooked chicken. Either use the leftovers from a rotisserie chicken or cube and sautee a couple of boneless, skinless chicken breasts
  • pie pastry for a double crust pie. Either use a refrigerated crust that you roll out yourself or make your own from scratch
  • cream of chicken soup. Campbell's makes a Healthy Request variety whose sodium content is at least a little better than the typical can.
  • 1 or 2 cups frozen veggies, thawed. My family will eat corn and peas in this recipe. If you can get your family to eat more variety than that, more power to you.
  • 1 or 2 medium potatoes
  • assorted seasonings

Directions:

  1. Preheat oven to 425.
  2.  Scrub, pierce, and microwave the potatoes until cooked, but not so done that they crumble when you cut them.
  3. While potatoes are cooking, roll out your pie crusts. Place one crust in pie pan. (I use a deep dish pie pan. Adjust the amount of filling you add to the size of your pie pan.) The other crust will be the lid, just let it sit on your dough board for now.
  4. In a small bowl, mix one can of cream of chicken soup with some seasonings. I just through whatever seems good it. I usually put in parsley, sage, rosemary, thyme. (I sing 'Scarborough Fair' while I add these. It's traditional.) I also like to add a little bit of garlic and paprika.
  5. When potatoes are cool enough to handle (just kidding...I just hold them with a dish towel and cut them while they are hot), peel and cube the potatoes. Or cube them and then pick the peel off of each little cube. Your choice.
  6. Place the cubed potatoes in the bottom pie crust. Season with Mrs. Dash. (or salt and pepper if you aren't on a restricted diet.)
  7. Spread one or two cups of thawed veggies on top of the potatoes.
  8. Spread seasoned chicken soup over veggies and potatoes.
  9. Layer cooked chicken over soup.
  10. Place top crust on pie. Fold edges of top crust under edge of bottom crust and pinch to seal.
  11. Cut a few steam vents in the top crust. Cover the edges of pie with strips of aluminum foil to keep them from over browning.
  12. Bake for 35-40 minutes. Remove foil during the last 15 minutes of baking. 
  13. Let stand for 10-15 minutes before serving.
Even though the pot pie really is a complete meal, I like serving it with homemade wheat bread. Big thick slices of warm wheat bread on a plate next to a savory pot pie is just heavenly comfort food with a capital MMMMMMMM.......


Tuesday, July 17, 2012

Two for Tuesdays: Pizza-dillas! and Caramel Cashew Blondies

What, you might ask, is a pizzadilla?

Behold...

The Birth of the Pizza-dilla

Here is the riveting story of how the pizzadilla came about. First, the circumstances must be desperate. As in, I have 5 adolescent girls coming to my house for a summer sleepover. The plan was to make homemade pizzas BUT this requires the use of the oven, the temperature outside is in the triple digits, and our twenty year old AC is limping along and not quite able to keep up. (Disclaimer: our AC unit isn't really 20 years old. I pulled that number out of my butt. Literary license and all.)

What to do?

Option A: order a pizza. Simple, but I lose an ice breaker activity which I feel is important since a few of the girls don't know each other.

Option B: The Jedi very graciously offered to go outside and grill the pizzas for us. This was a special sacrifice of love, because the Jedi hates summer heat just as much as I hate the winter cold. I, in some extra rare twinge of conscience, declined. 

Option C: Invent something totally new with the pizza ingredients that allows each girl to construct her own dinner but doesn't use the oven.

TA DA!!!!!

Pizza-dillas

Ingredients

  • flour or corn tortillas, one or two per person
  • shredded mozzarella cheese
  • pepperoni and/or ham
  • diced peppers and onions
  • spaghetti/pizza sauce, warmed and served on the side

Directions

  1. Layer cheese and other desired toppings on one half of a tortilla. Fold tortilla in half to sandwich pizza fillings inside the two halves of the tortilla. 
  2. Place stuffed tortilla in a frying pan. Cover to help melt cheese and fry for a brief time (half a minute?)  to lightly brown and crisp the tortilla. Flip and fry on other side. (Recover while crisping other side to continue to melt the cheese).
  3. Remove from pan. Serve with warm sauce for dipping.
How easy is that? Super-easy!


 Recipe number two that I give to you! (That rhymed and everything. I'm so spiffy.)

Caramel Cashew Blondies

I did not serve these for Sweetling's sleepover. I set out a sundae bar for the girls with bananas and homemade hot fudge as featured ingredients. But, I made these the following weekend, using my toaster oven to bake them in instead of turning on the regular oven. They were delicious. I've been looking for a substitute snack in lieu of store-bought granola bars and I think these might be an option. Yes, I know topping them with nuts doesn't make them healthy....but it does make them delicious!

   Ingredients


  • 18 whole caramels
  •  1/3 cup butter or margarine
  •  2 tbsp milk
  •  3/4 cup sugar
  •  1/2 tsp vanilla extract
  •  1 cup all-purpose flour
  •  1/2 tsp baking powder
  •  1/4 tsp salt
  •  1 cup chopped salted cashews
  •  2 eggs

Directions

  1. In a saucepan, cook and stir caramels, butter and milk over low heat until the caramels are melted and mixture is smooth.
  2. Remove from the heat; stir in sugar.
  3. Combine eggs and vanilla; stir into caramel mixture.
  4. Combine flour, baking powder and salt; stir into caramel mixture until blended.
  5. Transfer to a greased 9 inch square baking pan. Bake at 350 for 24-28 minutes or until a toothpick inserted near the center comes out clean. 
  6. Cool on a wire rack. Cut into bars.

Tuesday, June 26, 2012

Two for Tuesday: Summer Favorites

It is summer!

(yes, brilliant statements like that is what keeps my reader membership soaring.)

Anyway, I have two of my all time favorite summer recipes to share:

Quick and Perfect Corn on the Cob  and  Strawberry Cream Pie

Now, you might think corn on the cob doesn't need a recipe per say, but keep reading.

Quick and Perfect Corn on the Cob

I was at Meijer two years ago in July. There in the produce section next to the end cap bin of fresh sweet corn was.....THE CORN WHISPERER.  He wasn't a Meijer employee; he was just a sweet elderly gentleman that really liked corn. He seemed to be spending his afternoon hanging out by the sweet corn chatting with shoppers about....corn.

The Corn Whisperer showed me how to pick out an ear of corn without pulling down the husk. (You pinch the leaves between the top of the corn ear and where the silk comes out. If there's a lot of soft, squishy silk there, then not enough kernels were properly pollinated. If you feel the silk is fairly lean up there, then the ear is full of plump, juicy kernels.)

But, said The Corn Whisperer, don't peel the leaves back to check. (Nevermind the pretty and highly misleading photo. My camera is gone, so I can't take my own pictures. But I felt like a picture, even a misleading one, was still desperately needed.)

Of course, said The Corn Whisperer, you should buy your corn on the day you are planning on cooking it. The fresher your corn is, the better.

When you are ready to cook your corn.....do NOT husk it. Got that? You leave the husk on the corn, the way Nature intended it to be.

You place your corn ears in the microwave, husk and all. You might have to do just a few ears at a time. (Don't try to stack a dozen ears in your microwave.) I have five in my family, so I put in five...but really I should only be cooking three or four at a time. Depending on your microwave and on how crispy or how tender you want your corn, you microwave on high for 1 1/2 to 2 minutes per ear of corn. 

I like this method, because it doesn't involve a big pot of boiling water adding heat and humidity to my kitchen.

I also like this method, because the corn comes out perfect EVERY TIME.

Let your corn cool for a few minutes, then husk. Be careful, the corn is still very hot. You might want to use a dishtowel to hold the ear with. The beauty of this is that the silk just falls away from the corn.

Serve. Butter and season as desired.

Every summer meal is more like summer with fresh, hot, corn on the cob.

And, the most perfect summer meal calls for the most perfect summer dessert, which happens to be:

Strawberry Cream Pie

WARNING: This pie needs several hours in the freezer before it can be served. Be sure to fix it well in advance of when you need it. The day before or the morning of works perfectly!

Ingredients:

  • 1 (18 ounce) jar strawberry preserves (I used Smuckers)
  • 1 (14 ounce) can sweetened condensed milk
  • 1 1/2 cups diced, fresh strawberries (see directions)
  • 1 tablespoon lemon juice
  • 1 (16 ounce) container frozen whipped topping, thawed, plus additional for garnish if desired
  • 2 (8 or 9-inch) prepared graham cracker pie crusts (or homemade crusts)

 Directions:

  1.  Rinse and hull several strawberries. (I think I typically use about 2/3rds of a plastic produce container.) 
  2. Place the strawberries, a few at a time, in a food processor. Pulse just enough to have tiny pieces of strawberries, but don't puree them. Keep doing this until you have 1 and 1/2 cups.
  3. In a large bowl, mix the strawberry preserves, the strawberry pieces, the sweetened condensed milk, and the lemon juice.
  4. Fold in the whipped topping.
  5. Spoon into two prepared crusts.
  6. Freeze for at least 4-6 hours.
  7. Take out of freezer 5-10 minutes before slicing and serving. Top with additional whipped cream or fresh strawberry slices if desired.
Be prepared to have a new favorite summer dessert!


Tuesday, May 08, 2012

Two for Tuesday: Bread Machine Cinnamon Rolls

I first heard of this at the Cincinnati Homeschool Convention where I attended a workshop by The Money Saving Mom. She mentioned these as a great breakfast food (not everyday, of course!) and had a recipe on her site for these. She promised they were easy and delicious and she was right on both counts!

I followed her recipe almost exactly, with a few key changes. The following ingredients and directions reflect my changes. I tell you why I deviated, but you don't need to double anything. The recipe is already doubled for you, because I'm nice that way.

Bread Machine Cinnamon Rolls

Dough Ingredients:

  •  3 Tbs oil (The original recipe calls for canola. I used vegetable cause it's what I had.)
  • 1 cup  plus 2 Tbs warm milk
  • 2 eggs (The original calls for 1 egg plus 2 egg whites. Like that was going to happen.)
  • 1/2 cup sugar
  • 4 cups flour
  • 1 tsp salt
  • 3 tsp bread machine yeast

Filling Ingredients:

  •  4 Tbs melted butter
  • 1 and 1/3 cup brown sugar
  • 2 tsp cinnamon

Icing Ingredients:

  • 4 Tbs softened butter
  • 2 tsp milk
  • 3 cups powdered sugar, sifted
  • 2 tsp vanilla

Directions:

  1.  Put all ingredients in bread machine in order listed. 
  2. Run the bread machine on its 'dough' setting.
  3. Three options are now open to you. I won't tell you which path I took.
    • PATH A: Turn the dough out onto a lightly floured surface and proceed to step 4.
    • PATH B: Turn the dough out into a bowl with a lid and put in the fridge until you can roll it out.
    • PATH C: Be so excited about going to see the new Avengers movie that you totally forget about the dough in the dough machine so that it sits and has a nice extended rise time in the pan while you are watching some of the world's greatest superheros save the planet from Loki and his army.
  4. Preheat your oven to 325. 
  5. Roll your dough into a large rectangle. If, perchance, your dough sat in the machine longer than it should have, you might have to divide the dough and roll out one rectangle at a time. Just saying.
  6. Brush your dough with melted butter. Mix the brown sugar and cinnamon and sprinkle on top of butter.
  7. Roll the dough up and cut into sections about an inch to an inch and a half wide.
  8. Place rolls in  two greased 9" cake pans. Bake at 325 for 20 minutes until browned. (Alternatively, you can place your rolls in the cake pans, cover and refrigerate overnight, and then bake them in the morning.)
  9. While rolls are baking, mix the icing ingredients. Ice rolls while still very warm, but not while piping hot from the oven. 

I made these rolls as part of a breakfast buffet for out of town company, and they were a huge success! 

(The other dishes on the table were a bowl of cut cantaloupe and a double sized recipe of this breakfast casserole. I had made the bacon in the oven the night before. )


Tuesday, May 01, 2012

Two for Tuesday: Roasted Vegetables and Marinated Steaks

Mmmmmm.....Roasted Veggies

My dear friend Christopher Robin made these for me for lunch on Thursday. In gratitude, I dragged her to the mall to look at jewelry to accessorize an outfit. (Well, not dragged, per se, since she towers over me, but mall shopping and accessorizing isn't her favorite thing.) See what I good friend I am?

Ingredients 

• 1 small butternut squash, cubed
• 1/2 red and 1/2 yellow bell peppers, seeded and diced
• 1 sweet potato, peeled and cubed
• 3 red potatoes, cubed
 • 1/2 red onion, quartered
• 1 package of mushrooms, quartered
• 3 heads of broccoli, cut into spears
• 1 tablespoon chopped fresh thyme
• 1 tablespoon chopped fresh rosemary
• 1/4 cup olive oil
• 1 tsp garlic powder
• salt and freshly ground black pepper

 Directions 

1. Preheat oven to 450 degrees F

 2. In a large bowl, combine the squash, sweet potato, and red potatoes. Separate the red onion quarters into pieces, and add half of them to the mixture.

3. In another bowl, combine the peppers, mushrooms, broccoli and the rest of the onion.

4. In a small bowl, stir together thyme, rosemary, olive oil, garlic, salt, and pepper. split in half and Toss with each bowl of vegetables until they are coated.

5. cover a large roasting pan with foil and spray it with pam. Pull of a piece of foil that could cover half the pan. 6. take the potato mix and spread evenly on half of the pan then, put the foil on top.

7. Roast for 25 minutes in the preheated oven, stirring every 10 minutes.

8. Add the other vegetables and move the foil to cover them. Roast for about another 20 min, stirring every 10. 

They were so good, I could not stop eating them!

Luckily, Christopher Robin didn't hold the shopping excursion against me and sent me home with the leftover veggies. I saved them and ate them as a side dish on the Jedi's birthday when I made...

Ta Da!

Marinated Rib-Eye Steaks

I found several recipes for a marinade, but I didn't have all the ingredients for any of them. So, I substituted without any rhyme or reason. Here's the recipe I started from. Here is what, I think, I made:

 Ingredients

  •  1/4 cup olive oil
  • 2 Tbs apple cider vinegar
  • 2 Tbs Worcestershire sauce
  • 2 Tbs low-sodium soy sauce
  • 2 Tbs bbq sauce
  • 1 tsp garlic powder
  • 1/2 tsp onion powder
  • 1/2 tsp ground black pepper
  • some crushed dried basil (yeah, I was crushing from whole dried basil leaves so I didn't measure
  • 1/2 tsp dried thyme
  • 1/2 tsp dried rosemary
  • 3 or 4 steaks (6 oz says the original recipe.)

Directions

  1.  Put everything, except the steaks, in a bowl and stir.
  2. Place the steaks in a non-reactive dish. (The original recipe says to pierce them on both sides first. I forgot that step. I leave you to decide whether or not to pierce your steaks.)
  3. Pour the marinade over the steaks, flip and coat both sides.
  4. Allow to marinade in the refrigerator for 3 to 4 hours. (Again, the original says to flip them halfway through. Do you think my steaks got flipped? They did not. I wasn't even home.)
  5. Now, I don't have a grill. I have a smoker. Its a totally different piece of equipment. I cooked mine under a gas flame broiler. I used the drip pan (one with an upper pan with holes in it and a lower drip tray) and set the pan at the medium height. I broiled them for maybe 8 to 10 minutes on one side, flipped them, and broiled them for maybe 5 to 8 minutes on the other side. I didn't set a timer, so those are big maybes. 
They were delicious. This alleged thing called a grocery budget not withstanding, I think I need to have steak once a month. 

(In case you were wondering, I made baked potatoes and corn as a side dish for those unenlightened in my family who won't go for the roasted veggies. And I had homemade wheat bread on hand. I marinated three of our 6 steaks, in case my marinade was crap. I used a store bought steak rub on the other three. All of them turned out beautifully.)


And having had so much baking success recently (this is sarcasm, by the way), I'm tempted to try making my own English muffins. Still looking for an easy recipe. So far, this might be the best I've found. I'm going to follow the variation described in the second comment.

Sunday, April 22, 2012

Curriculum Choices

You think its too early to be picking curriculum for next year? Think again!

The biggest problem with picking curriculum for next year....is that I want to be finished with the ones we're using now! Still have a few weeks to go in this school year though!

Sweetling's possible courses for 2012-2013


  •  One Year Adventure Novel
  • (Sweetling found this one herself at the convention and is excited about it. We bought it, so this is a "for sure" for next year.)


(For Sweetling's high school years, I want to incorporate some elements of classical education. Sweetling spoke to the author of this book at the convention and is excited about doing logic next year. We're going to hang out on the waterbed and read this book together.)


  • Japanese
  • (another awesome Sweetling find at the convention.)
  • The World of the Bible: Matthew-Acts
  • American Literature (yeah, we don't have a curriculum or a reading list yet. I'm working on it.)
  • American History (led by the Jedi.)
  • German (with the Jedi)
  • Shakespeare (at co-op)
  • General Science (at co-op)
  • Spanish 3 (at co-op)
  • American Sign Language 1 (at co-op) 
  • Drawing (at co-op)
  • Vocabulary from Classical Roots (We need to get back to this. I think I'll do this course with her, so we can try to use the words in our regular speech more often.)
  • Algebra 2 or Pre-Calculus (I'm going to look for a decent, used Algebra 2 text. Then, with each chapter, we will pretest. If she already knows it, we're not doing it again. If she doesn't know the chapter, or is missing pieces, then we'll just do those sections. The Algebra 2 book I saw from A Beka primarily contained material Sweetling already mastered a few years ago.  I'm going to look at some books from Holt McDougal as well. We might need to go to pre-calculus to find some new math concepts for Sweetling.)
Sound like a lot for a Sweetling? Maybe. But some of these won't take much time per day or even much time per week. I think she can handle it and we'll scale back if need be. The important part of this curriculum is that she picked out most of it herself. She loves languages, and is so quick to pick them up, so I'm letting her run with it!

Toa of Boy's possible courses for 2012-2013


(I bought a course which includes spelling, handwriting, grammar, light vocabulary, simple composition....with exercises and directions geared toward the kinesthetic learner. The presenter sold me when she was incorporating relay races, scavenger hunts, and nerf guns into spelling lessons. )


 (This is designed as a one year history/geography curriculum....but I looked at it and we're going to do it over two years to give us time to read historical fiction and do cool hands-on projects. I like how each small unit includes a lesson overviewing that particular period of history, a lesson on a natural landmark, a lesson on daily life at the time, a brief biography of a noteworthy American, and a lesson on a man-made landmark. Each unit also has a hands on art, cooking, or building project as well as mapping and timeline activities.)

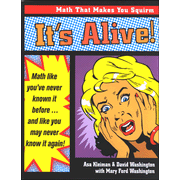
  • Finish off Elementary Math. (I'm going bookless for this one. I can't find a fifth grade math curriculum worth our time. I think we'll take half a year to finish off fractions, decimals, ratios, probability, and geometry. I'll use my Teaching Children Mathematics textbook from college to help me cover all the concepts in a reasonable order. Then we're moving on to fun math....like "It's ALIVE: Math that Makes You Squirm!"
  • Reading (Toa of Boy wants the opportunity to throw a pie in my face if he reads a certain number of books during the school year. Lovely.)

  • Mythbusters: Don't Try This at Home (Unless We Tell You To) (Cause what is cooler for science than watching a Mythbusters episode, then reading a bit about the science behind the experiments, AND THEN TRYING ONE YOURSELF).
  • EDIT TO ADD: Toa of Boy just told me he wants to learn about the human body...so we might be doing Apologia's Anatomy and Physiology instead. 
  • Art by Deep Space Sparkle. (I just love this site. I want to be a bit more intentional about Toa's art, because he is so gifted. I found a great curriculum at the convention, but it was a bit pricey...and I think that I'm going to wait one more year before going more 'formal' with Toa's art instruction. Meanwhile, Deep Space Sparkle has lots of terrific lessons which showcase important 'building blocks' of good art.)
  • Chess (at co-op)
  • General Art (at co-op)
  • Travel USA (at co-op)
  • Phys Ed (at co-op)
  • Lego Creation (at co-op)
 Looks good, doesn't it?

And finally, for the mom...(that's me, by the way)...I found a really interesting planning site at PlanBook.com. Now, if only I could find myself a robot, fairy, or brownie that would do most of the housework for me, I'd be set to go!

Tuesday, March 27, 2012

Two for Tuesday: Oven Bacon

I hate frying bacon. Nothing about being spit on by popping hot grease is fun. So, I hate frying bacon.

I've tried several different oven bacon recipes, usually with the result of filling my oven and kitchen with smoke, setting off every smoke detector in the entire house, and, a long time later, having either too tough bacon or soggy bacon. There was never a middle ground in bacon texture when I tried baking it.

I tried making bacon in the microwave too. That results in going through a half roll or paper towels, dangerously super-heating my plates, and getting a few pieces of bacon done at a time, with similar texture issues.

But today, oh glorious day, I found method for making

Perfect Oven-Fried Bacon

Here's the key trick:

Do NOT pre-heat your oven.

Once you know that, the rest is super easy.
  1. Line two baking sheets with aluminum foil. (Use baking sheets with rims to contain grease).
  2. Place strips of bacon on the baking sheets. I found that each baking sheet held about half a pound without any overlapping of strips.
  3. Put the baking  sheets in the COLD oven. Then close the door and turn the oven on to 400.
  4. Bake. The original recipe said to bake for 17-20 minutes. Mine took closer to 30. They are done when they turn a golden brown without being or looking crispy.
  5. Take them off the baking sheets as soon as they are done and transfer them to a tray of paper towels. Do this right away. I mean it.
  6. Eat. They are juicy, delicious, and reasonably mess free!
The original recipe called for baking a whole pound on a single baking sheet. I don't see how that would be possible without seriously overlapping the strips. I think that would result in just one big sheet of bacon. The Jedi might not see a problem with this outcome. The Jedi might want to use this outcome as our new kitchen curtains. Mmmmm,says the Jedi,---bacon curtains, how could they be wrong?  I just used two baking sheets and kept my bacon well separated to avoid domestic decorating disputes.

My next cooking adventure will be a chocolate volcano cake. Somehow a science lesson on Venus led to me promising Toa of Boy that we'd make a volcano cake together. I'm considering two recipe options. One is from the Pioneer Woman, because you can't go wrong with Ree. And one is a hot fudge cake which I've made before with success.

We'll see which one Toa prefers.